

My 2025 Mobile Hunting Setup (Step‑by‑Step Guide)
Beau Martonik
By Beau Martonik — East Meets West Hunt
Mobile hunting has been my thing since I was a kid—climbers, hang‑ons, saddles, the whole progression. I’ve been saddle hunting since 2019, and this 2025 setup is my favorite so far for Pennsylvania big woods and the other places I travel. Below, I’ll walk through every piece of gear, how I climb, and how I stay safe and quiet.

The Core System
-
Saddle: Timber Ninja Duel Saddle (two‑panel), same chassis comfort as the Ultimate—minus magnetic stick clips, mud‑flap stick carrier, and removable buckles for a lower cost.
-
Platform: Timber Ninja Kunai Platform — ~4 lb 10 oz, 20" front‑to‑back, ~16" at the widest / 14" at the narrow; billet aluminum, no cables or post in your way.
-
Sticks: Timber Ninja C2 Carbon Sticks (set of four) — with USA amsteel attachment (prusik), Carb‑Tech wider steps, glow‑in‑the‑dark end caps, magnets, and “dog ear” tie‑in points.
-
Ropes: Two 8 mm ropes (lineman’s + tether). I often run a prusik + tender for quiet adjustability on the lineman’s rope and a Kong Duck on the tether.
-
Pouches/Organization: New Ninja Max quiet‑fleece outer fabric on Ridge Pouches, Ridge Bolte Holster, and Ridge Belt Pouches.
-
Extras: Single‑step aider on the bottom stick; platform holder (magnetic); Amsteel stick haulers; optional Amsteel gear strap or traditional webbing strap; hero clip for pack/bow; tape/silencing where needed.
Why Saddle? It’s a Tool, Not a Religion
Saddles aren’t a cure‑all—they’re another tool. I still respect climbers and hang‑ons. But for the terrain and distances I hunt, this setup is fast, quiet, light, and comfortable for all‑day sits. The real win is efficiency getting in, up, and settled without excess bulk or noise.
Gear Breakdown & How I Pack It
1) Timber Ninja Duel Saddle (Two‑Panel)
-
Comfort/Chassis: Same padded two‑panel chassis feel as the Ultimate.
-
What’s not on the Duel: No magnetic stick clips, no mud‑flap stick carrier, no removable buckles—keeps the cost down without sacrificing the core comfort.
-
Quiet Storage: Updated pouches in Ninja Max fabric (quiet fleece outer, highly water‑resistant zippers). Bigger Ridge Pouches for real capacity.
-
My Pouch Loadout:
-
Right Ridge Pouch: 8 mm lineman’s rope (girth‑hitched to lineman loop) and 8mm tether with Kong Duck.
-
Ridge Bottle Holster - Dump‑style Pouch: Bow rope + gear strap (currently testing an amsteel strap with 3D‑printed hooks; webbing straps still work great).
-
Rear Ridge Belt Pouch: Knee pad (strap‑on pad; I wrapped mine in camo fabric).
-
Belt & Leg Straps: Magnetic belt is secure and quiet; leg straps recommended.
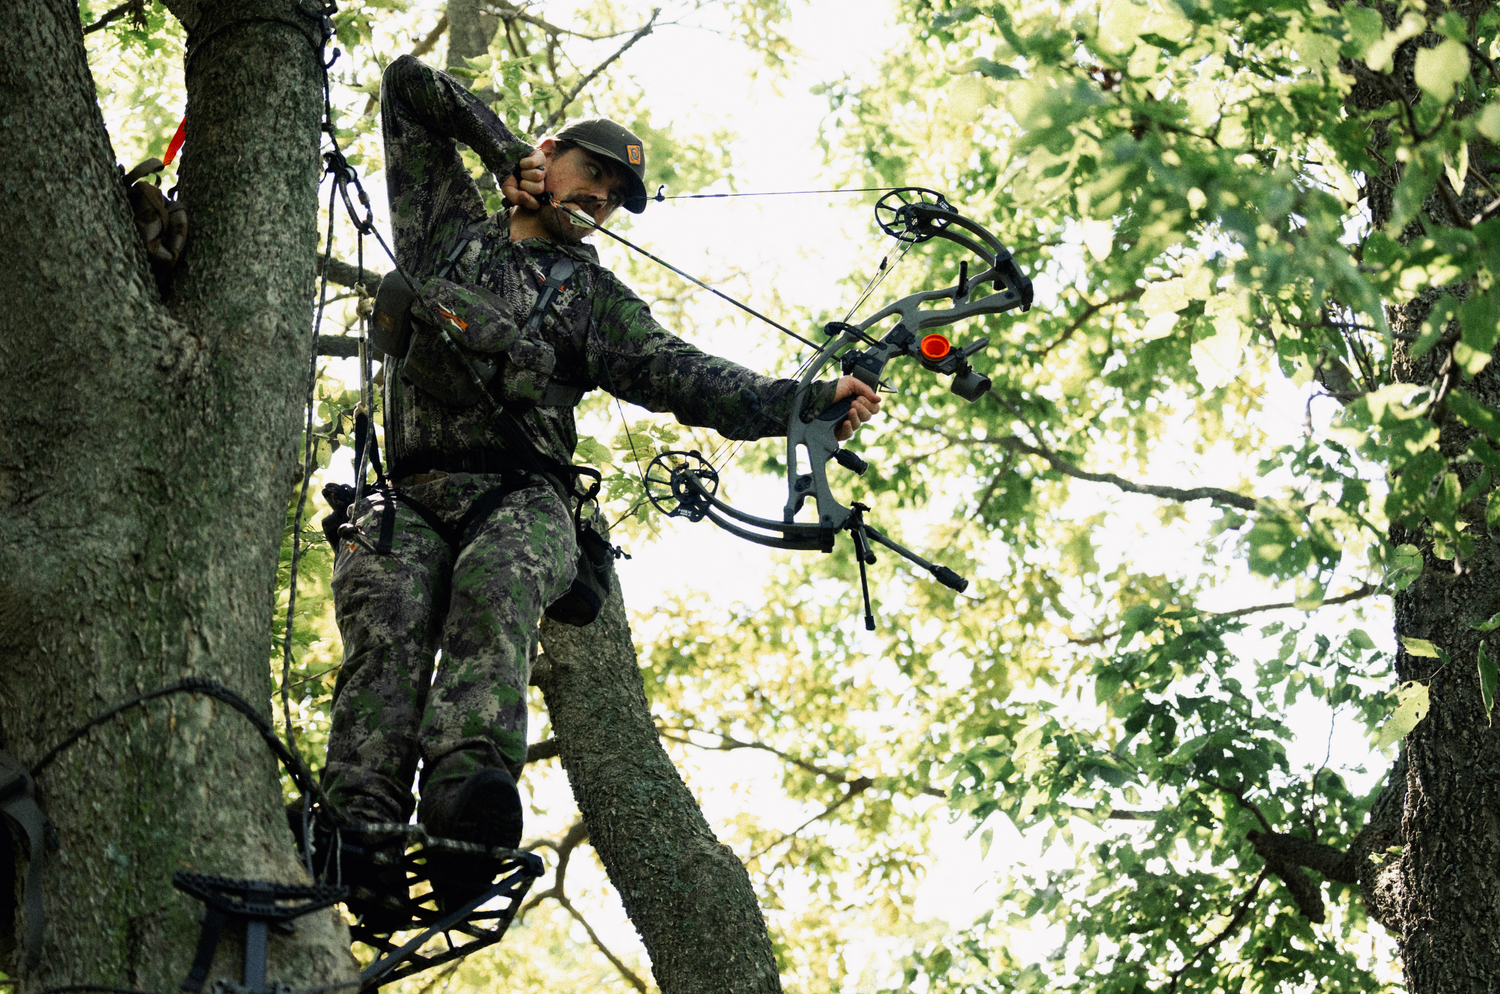
2) Timber Ninja Kunai Platform
-
Specs: ~4 lb 10 oz; 20" front‑to‑back; ~16" widest / 14" narrowest.
-
Design: Billet aluminum (not cast), no cables/post to reduce weight and maximize foot room.
-
Tree Bite & Safety: Very sharp teeth (I use glow rubber caps for transport). Hook redesign keeps the strap from slipping. Final production includes a safety strap to prevent kick‑up if under‑set.
-
Attachment: SSP XL Strap is my go‑to; cam buckle or other methods also work.
-
Silencing: I add Tesa tape or hockey tape on bump points to kill incidental noise.
3) Timber Ninja C2 Cabon Fiber Sticks (x4)
-
Attachment: USA amsteel with a prusik—simple, light, quiet.
-
Bottom Stick: Single‑step aider girth‑hitched so it can’t fall off.
-
Step & Stand‑Offs: CarbonTek wider step for comfort; proven stand‑off bite.
-
Noise Control: Integrated magnets keep sticks nested; I add thin Tesa tape so they “kiss” quietly.
-
Low‑Light: Glow end caps help with safe foot placement in the dark.
4) Ropes & Hardware
-
Lineman’s: 8 mm with prusik + tender (I moved away from the Kong Duck for noise).
-
Tether: 8 mm with Kong Duck; I like to tie a backup loop/stopper for redundancy.
-
Bridge: Keep it short while climbing; loosen for comfort in the tree.
5) In‑Tree Organization
-
Gear Strap: Amsteel gear strap with small hooks (testing) or traditional webbing strap. Start by placing the bow hook exactly where you want the bow.
-
Pack Hook: I tie a small loop in the strap and clip in a hero clip so the pack rides low—out of the way for weak‑side shots.
-
Platform Holder: Magnetic holder on the saddle lets me remove the platform without fumbling.

Final Thoughts
This system checks my boxes: fast to deploy, quiet on approach, light to carry, and comfortable enough for long sits. It also keeps me safer by making it easy to stay connected throughout the climb. If you’ve got questions, tweaks that worked for you, or want me to film a dedicated weak‑side shot tutorial, drop a comment on the YouTube video.
— Beau